Swap with Vivian
Hey Anny!
So you know how much I love post, but postage is so
expensive. I do love to send things, but I can’t overdo it, especially international post. Most of my penpals
are international and that means “don’t make mail too heavy!” otherwise I have
to start selling my organs one at a time… (I don’t even know how many organs we
have that we can actually sell and how much I would have to ask for them!) I have one penpal in the same country and I do love to get
mail faster than usual. The Dutch post: PostNL will deliver the post the next delivery day! Anyway, babbling here.
I decided to do a swap with Vivian, The Paper Letter Blog on Instagram and YouTube. I’ve been watching her videos for some time now, I don’t know how I stumbled upon
her channel, but I like her style. She likes to babble (this is a good thing, I
know it can have a negative connotation to say babble) in her videos as if
she’s sitting across you with a cup of tea! You will see her cup in a corner on the screen. She’s also a fellow Dutchie, which means I can send a big mail without having to sell my kidney! Or Kidneys… Can you
live without any kidneys? However she speaks English on her channel! Her videos are mail
related videos! What crafter does not like to watch those?
So I contacted her with a direct message on Instagram asking her if she would be interested in swapping happy mail. While we were talking she asked what kind of swap we could do, for me any kind of happy mail is love. Plus I like to see the style of the person who sends mail. We decided on some happy mail!
Vivian has a stamp/ weight
guideline, basically you agree on sending the same amount and will put about the same amount of stamps on your mail. With PostNL it means 1 stamp 20 grams, 2 stamps is 50 grams, 3 stamps is 100
grams, 4 stamps is 350 grams, 5 stamps is up to 2 kilo for a letter if it fits
through the mailbox! This is the national postage (international has different guidelines and zones), 1 national stamp is 83 cents. (I remember when it 39 cents... When we got the Euro. God, I feel old now!) I had to look it up and in my head it was slightly
different, I guess the guidelines changed for the post while I was stuck with
the old guidelines) Which is smart, so it is fair for both mailers.
She said 100 grams, I went up to 250 (350 now!) cause I am
pretty sure the 100 grams would not work out for me! You will see it did not ;)
Then I asked about a theme and colour: her favourites are green and blue and light,
flower like colours (pastels), spring colours and flowers. No kawaii stuff or darker colours!
I do like to know this information to be able to sent a mail that the receiver will like a bit more.
I do like to know this information to be able to sent a mail that the receiver will like a bit more.
So I went in to my stash and took out the first paperpad
that had blue/green and flowers in it! Didn't want to go through the whole stack, it was late and I need to clean up the papers... At some point.
I wasn’t sure what to do for happy mail , so the papers stayed on the desk for a bit, I even made a little happy mail for Kyra with one of the papers and decided that I could use that idea for Vivian too.
I wasn’t sure what to do for happy mail , so the papers stayed on the desk for a bit, I even made a little happy mail for Kyra with one of the papers and decided that I could use that idea for Vivian too.
So I am not sure what to call this project, it is either a bunch of loaded tags or a tag flipbook hold together by a ring binder! I didn’t take photos in between, because I was busy making it, but I will have enough photos to show how the tags ended up being. The first tag will have photos with the used materials around it, but then it was so much work I got lazy and decided to just take photos of the tags. Enjoy looking through them!
Also random fun fact: first one I ever made was for you! That was 2 years ago...
Used Materials:
*Craft Sensation Paper Block: Sweet Garden Roses
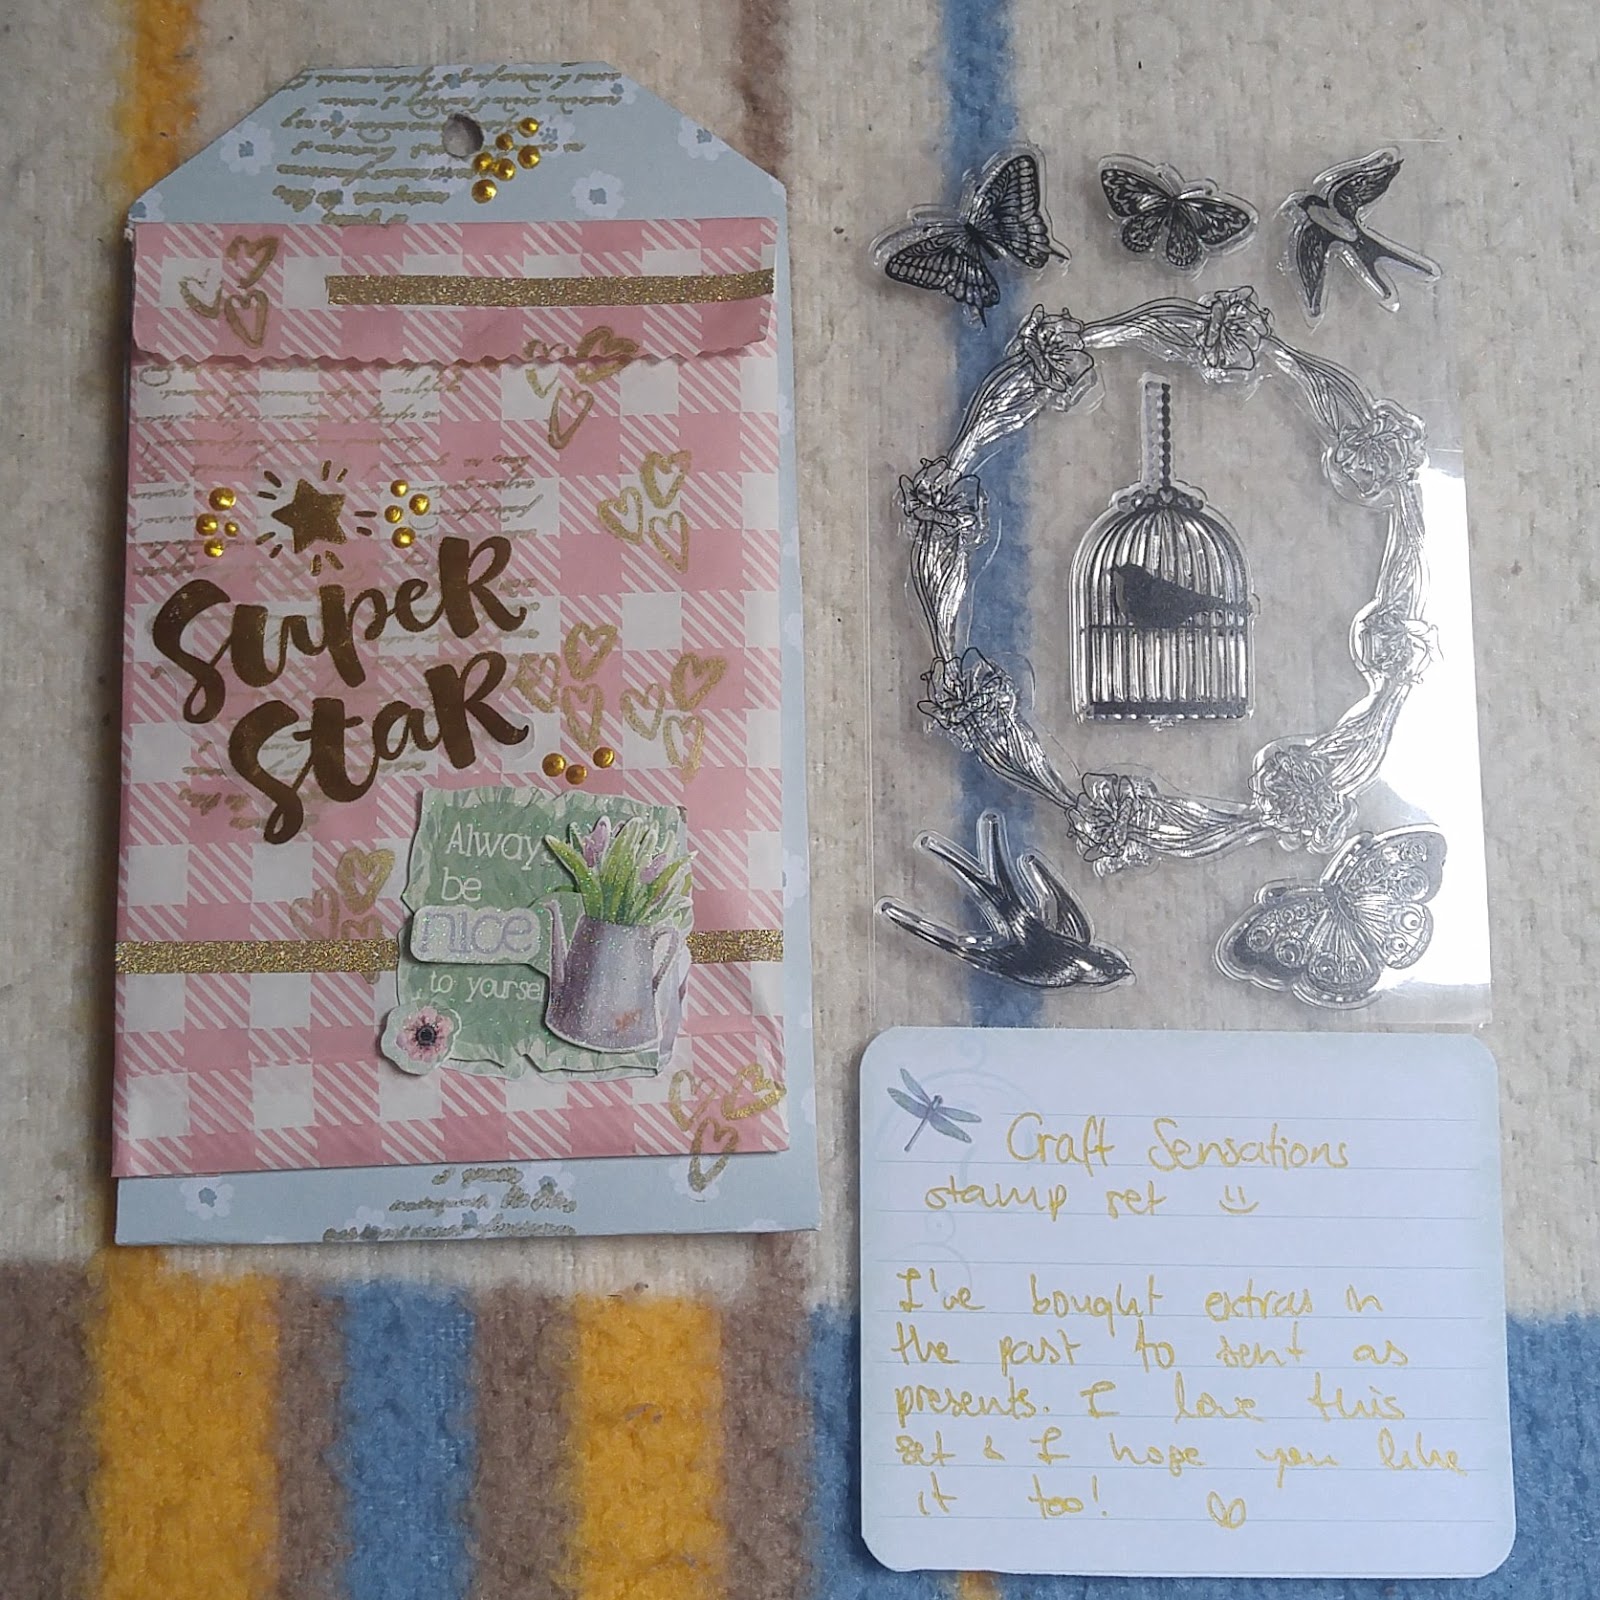
*Clear Stamps: Craft Sensations CR0274/18A, CR0274/16A2, CR0274/17A2
Joy
Craft Clear Stamp Script 6410/0468
*Decotimecrafts butterfly decoration
*Decotimecrafts glitter foam stickers
*Decotimecrafts 3D stickers
*Decotimecrafts Vellum Paper
*Hobby Paper rope (Hobby Flora)
*Paper doilies from Sostrene Grene (blue, pink and gold)
*Wax Seal (pink, green and gold) from Hema
*Wax Seal stamp heart (Hema), tree (Aliexpress), fleur de lille (Lidl) and rose (Sostrene Grene)
*Hobbymarker Permapaque
*Punch Studio Paper pad
*Metallic Cardboard (Kruidvat)
*Big Tag (Sostrene Grene)
*VersaMark inkpad
*VersaMarker
*Encore Gold ink pad
*Ranger Embossing Powder Gold
*Hybrid Medium 1.0 mm Gold pen
*Dies ( Joy!Crafts and Aliexpress)
*Paper Roses (pretty sure they’re from Kruidvat)
*Washi Tape (Sostrene Grene)
*Effect liner (Sostrene Grene) <-- I might end up calling this 3D pearl paint...
*Joy!Craft Card and envelope maker (to score the lines straight)
*Foam tape
*Scissors
*Stanley knife
*Bone folder
*Hole Puncher
*Joy! Craft Tacky Tape
*Double sided tape
*Tape
*Binder
*Paperclips
*Envelope
*Tissue paper (or is it decoupage paper?)
*Ranger Archival Ink by Wendy Vecchi: forget-me-not, library green and vibrant fuschia
*Mod Podge Gold shimmer

I looked through the stack of papers I had and picked out the Sweet Garden Roses paper block from Craft Sensations, bought this one from Action some time ago... I used a big tag from Sostrene Grene as my template! The tag is 20 x 10 cm. I picked out 3 of the pages.

Like I said I don't have the in between photos, but this is basically what I did: put the tag template on the paper, 1 cm away from the side, draw the tag, pulling the line down, you'll have a longer tag, you can fold the 10 cm extra for a pocket. Add 1 cm to both sides on the longer part. Cut away the corner. Fold the under side of the tag and then fold the 1 cm to the inside, add some tape (tacky tape in my case, you can glue it too, but I find that messy) and stick it. You'll have a small pocked you can fill with things! (Oh I scored the lines with my envelope maker, so it will be staight and proper)
As an example I used a smaller tag to show it, with 0.5 cm for the sides. I hope my explanation with this photo makes some sense!
Oh and I use a bone folder to make the folded parts flat. Of course you can use anything you like, but I like the existence of bone folders!

Now I ended up with 5 tags, 4 with pockets and some extra goodies (teas, washi tape and post it notes) in between!
This is the front side of each tag.

This is the back side of each tag!

Now I was going to do this for each tag, but looking through the things and putting them together was a bit too much work... So I am only doing this for the first tag, laying around what I have used for it. I forgot to add the most important thing on this photo: the paper pad.
The order that I worked in was: measure and cut the paper to make the tags, fold and tape them shut, put them in the order I want it to be and start the decoration.
I actually started making the tag with the rose that has Vivian written on it, but wanted to add a Hello or Hey, but it didn't fit... So I ended up picking a new first tag and added a HEY LOVE with some gold cardboard stickers. I used a pink doily to tone down the blue on the other side of the paper, it has pink roses on the outer side, I added a butterfly as well. I put it away to pick it up later to add other details like stickers, stamps, embossing powder and gold 3D dots (made with the effect liner)
The butterflies, gold glitter tape, gold dots, vellum paper, stamping and embossing come back in every paper, one side or the other.

FIRST TAG
So this tag has the letter in it, that I wrote with a golden pen and some paper roses that I have been using (they're on my desk cause I will use them for another project, but I still need to order photos for that. I am pretty sure I have more of these flowers...) I didn't like the way the letter looked when I put it in and I decided to make a little envelope to put the letter in! That was one of the last things I did. That is why it has orange butterflies (I was out of the smaller pink ones... Yes, I got a new packages of these butterflies...) But the orange fits with the gold.
The vellum quote, gold dots, foam glitter stickers and heart stamps are all added later on when all the tags were finished.

To make the envelope I used one of the smaller envelopes I have, I just ripped it open and drew around it, but made it slightly shorter! The lenght of the letter paper when I folded it!

Of course this envelope needed some decoration too! I used the rose stamps, scripts stamp and the border stamp and embossed it with Ranger gold embossing powder. Gold dots and the glitter foam stickers (pink one bottom left corner).

The back of course needed decoration too. I wrote down letter on the flap of it, so it will be just above the pocket so she can read it! Oh and to close it I used a glue dot!

This is what I used for the back side of the first tag! I realise I added the letter in this photo again... (Also sorry for the glare, not in the right head space to fix light...)

Stamping, vellum quote paper, glitter tape, embossed and stamped images and a pocket filled with paper clips. The pocket is a straight piece of paper that I taped on the side. The paper clips are from my desk again, I took out the different ones I had. I really hope there are some new ones for her!
After I added the glitter tape I decided that every tag would have some glitter tape in the back side of it!

Detail of the envelope for the paperclips, I also folded the upper part and glued it down (probably with double sided tape) so it looks nice when you open it! As you can see the heart stamps and gold dots are here again.

I used a glue dot to close this envelope too! :) I love the glue dots, they are perfect for closing envelopes and not destroying the paper!

And detail photos of the embossed script stamp!

SECOND TAG
The second tag ended up looking like this! The 'hello beautiful' is a 3D sticker. Be positive & wake up and smell the roses are vellum quote papers, I added some glitter foam sticker to it and a butterfly. Again a lot of stamping going on and the gold dots.

In this one I decided to put some stickers. I also added a small note with what is in the tag and where I got them. This one has stickers from Action, Ikea, Kruidvat and Sostrene Grene in it.

They are held together by another paperclip. Plus the little note with information, I added this to each pocket. I like little information pages...

For the back of this tag I decided on a paper bag with some goodies in it! I added the decoration on the paper bag as well! As you can see there is some glitter tape too.

what I put in it is some stamps that I got extra from Craft Sensations some time ago. I never used these (did use my own), but I remember throwing away the packaging to make space and get rid of excess paper... Now I am laughing at that thought... I got more papers since... Anyway I like to get these stamps for penpals, sometimes I have extras!
THIRD TAG
The next tag I laminated to use as a big washi sample tag.
The washi tapes on the left are the ones I saw again when I was cleaning up, they're from Cavalli and Co and I love them, so I wanted to share some of those too! That is why they are on a seperate tag.Oh and all the washi tapes on the tag, besides the glitter one, are from Sostrene Grene! I hope she likes the tapes I choose for her! I only used the glitter tape for her mail.

I was going to add these sticky notes to a pocket, but because it became bulky I decided to use it as a tag. I do realize I could have used a different tape to do the corners/ sides? That white tape is so ugly now I look at it...

Of course I had to add some sticker wax seals. I made these wax seals on baking paper, you can pick them up after it dries. I added two sided tape to the back so she can use it again for her mail. I used wax sticks from Hema, I didn't have any light blue sticks, so I used the green one. I also colored the images with markers to make them pop! As you can see I can try harder to make it look better, I am not good with the wax!

FOURTH TAG
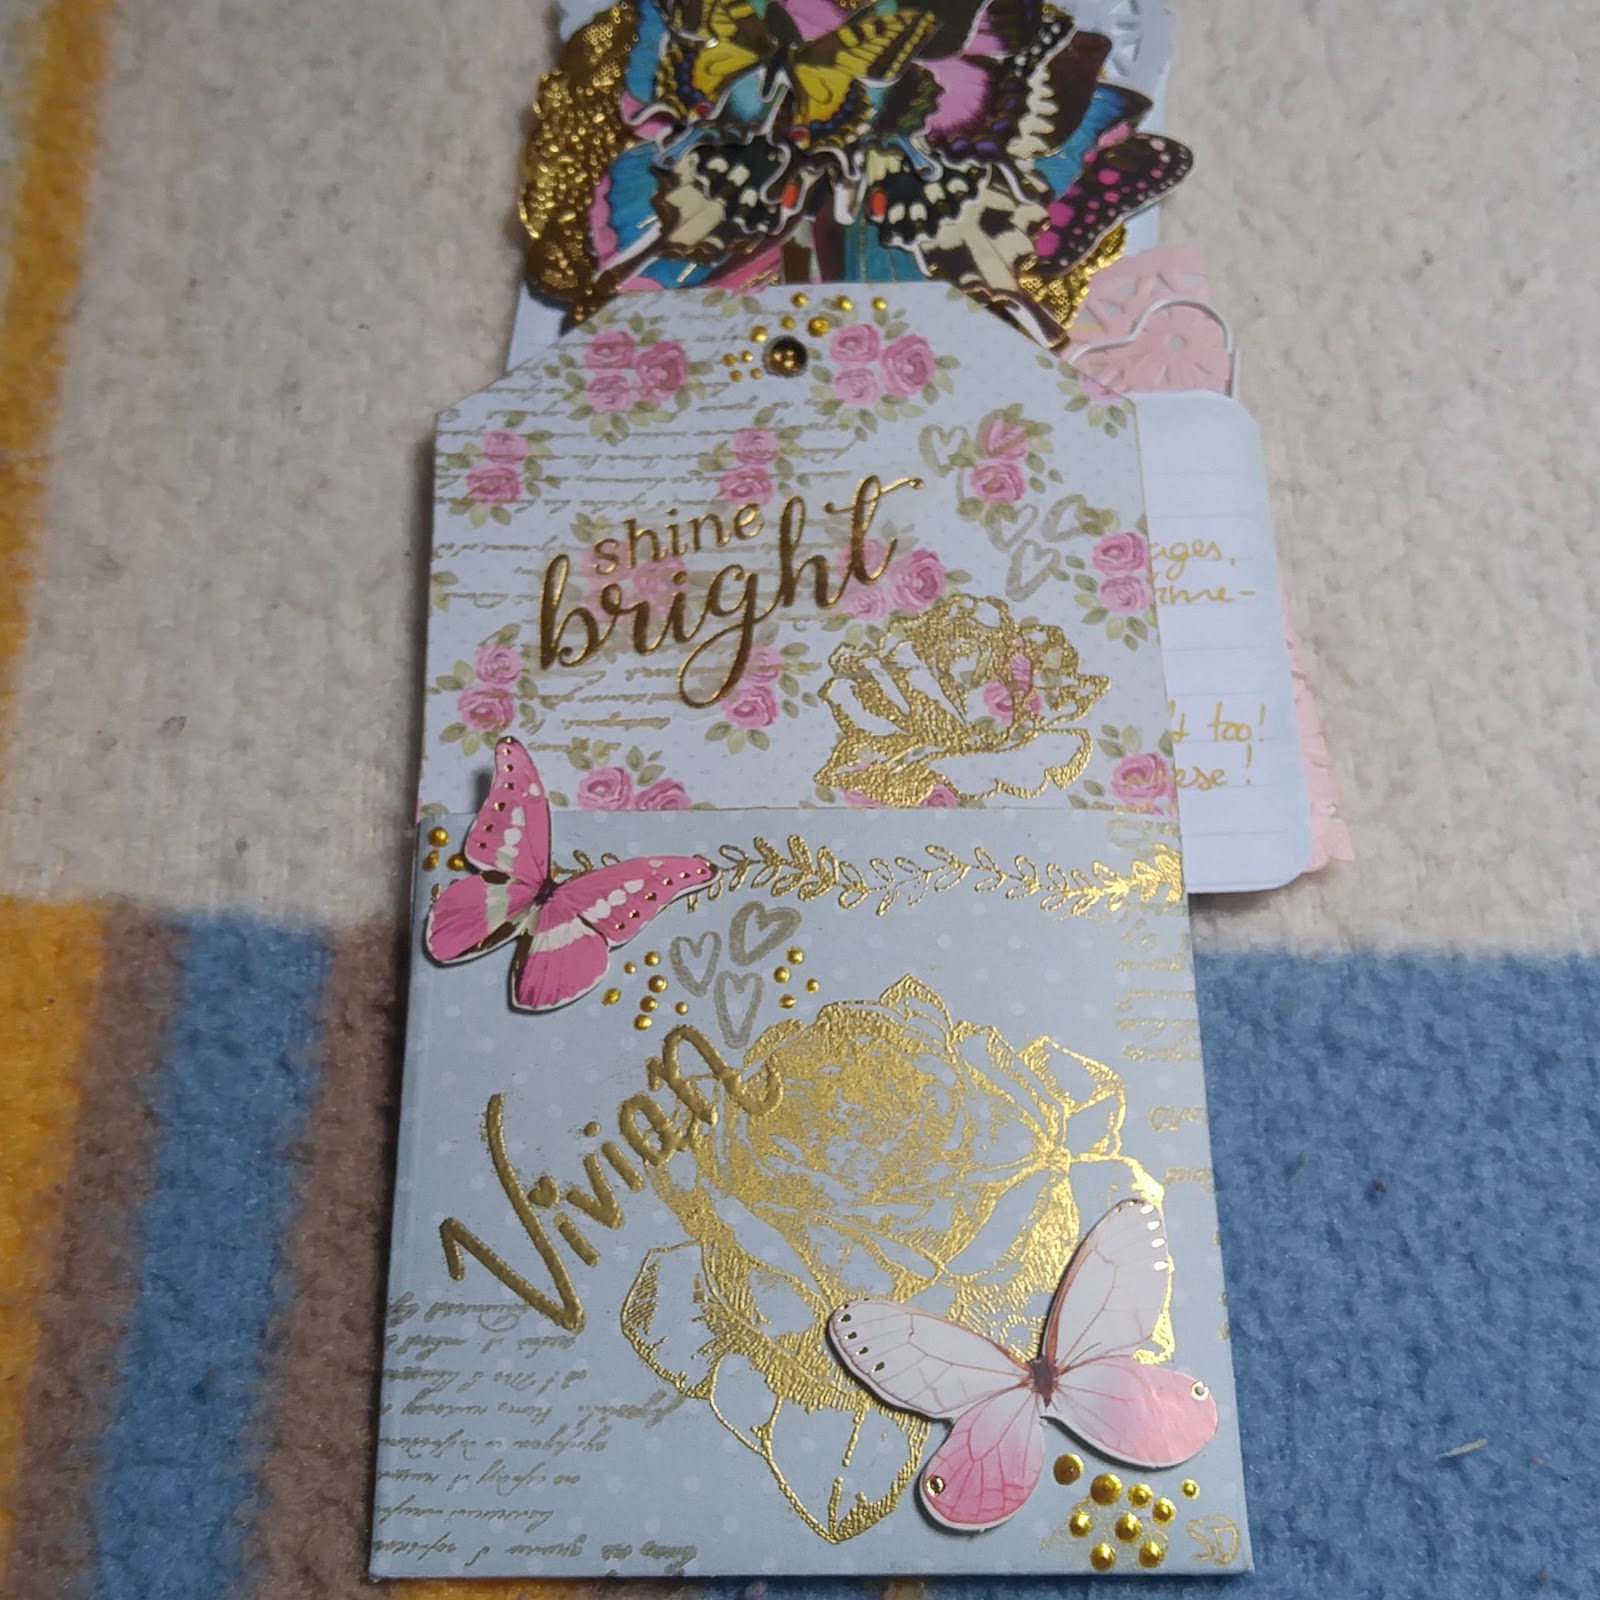
The next tag is actually the tag I started with! I wasn't able to add a Hello/Hey to it... Well I embossed roses to this tag and wrote her name on it. I added the script stamp, vellum paper, butterfly and gold dots too.
I put some butterflies, notepaper (I used for the letter and notes) and vellum quotes in this tag pocket. They are all hold together by paper clips :)

The inside

The paper I used for the letter, notes and added to the pocket!
(Punch Studio Paper pad)

The back of this tag! Gold glitter tape, embossed rose and border stamps, heart stamps, golden doily, punched circle with a golden V sticker and the butterflies!

FIFTH TAG
And the last tag! Wooo! This is how it looks! Now that I look at it I am annoyed about the 3D and glitter foam sticker (upper right side). They look a bit lost... I already sent it so I cant change it! Used the script stamp, vellum paper, butterflies and the dots again.

This tag is filled with vellum paper with prints,cards and die cuts. It is hold together by a paper clip, I also added a little 3D sticker (the kid blowing bubbles) cause I wasn't happy with how empty and boring it looked.

Inside the pocket: printed vellum paper, some cards and a pocket of die cuts.

Detail of the pocket with the quote and butterflies.

Remember the backing paper I used to make the wax seals? Well I didn't want to use plastic, so I decided to use the paper to make an envelope to put the die cuts in. I decorated it with some stickers and added a washi tape to write die cuts on.

I looked through my dies (I have soooo many butterfly ones!!!) and decided to pick these butterflies to die cut. I hope Vivian will like them! I cut them out from the left over papers of the tags and gold metallic paper! (I should have made some cat and word ones...)

The back of this tag! Like I wrote earlier, they all have glitter tape, glitter foam stickers, butterfly, golden dots, script stamps and a quote that was on a vellum paper.

Detail photo!

To hold this together I have used a ring binder that I decorated with paper rope. I also gold embossed ring binder, it was silver coloured, but it is coming off... At least it will be gold when Vivian gets it! I rubbed some of the gold in and added the gold fots on this one the rope.
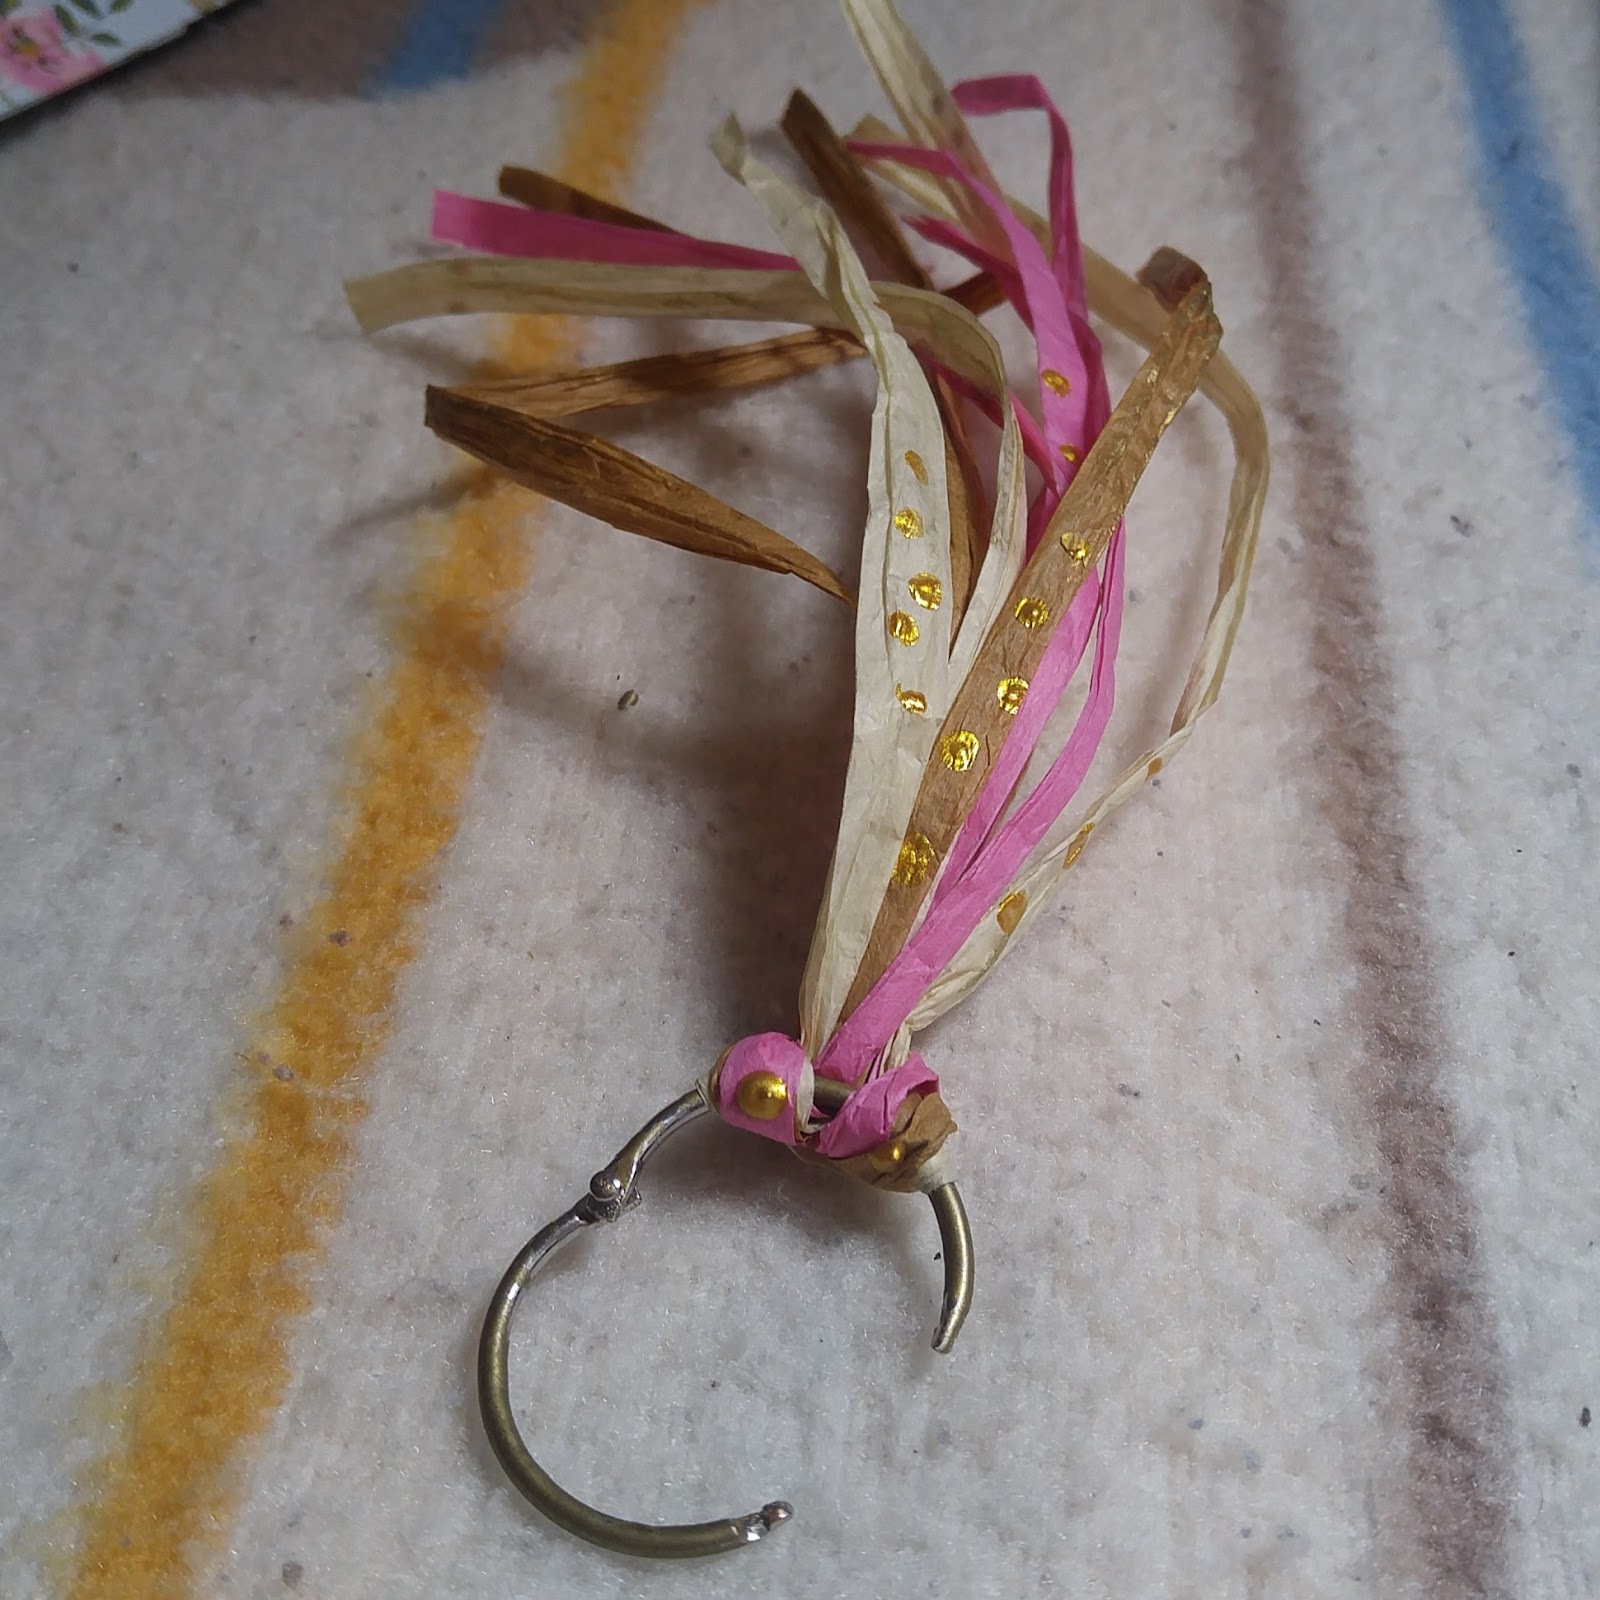
This is how it looks when you put them all together on the binder.... Which is a bit too thick to fit through the mail box, so I had a solution for that...

PACKING
Now that I finished the tag I can start decorating the packaging and envelope. First I wanted to wrap the happy mail in some pretty paper. I need to look though and sort my tissue and decoupage papers. This is the first one I saw so I grabbed it and decided to decorate it! A doily, some stamping, gold dots, butterflies, stickers and taaadaaaa!
Oh I think I used glue dots and double sided tape to stick the butterflies, if she's careful she can re-use them too :)
Oh I think I used glue dots and double sided tape to stick the butterflies, if she's careful she can re-use them too :)

I didn't use any of the vellum quotes since the sticker already had a nice and fitting quote! Of course I added her name too, since the other tag sticker has a "For" written on it.

Now my solution is that I put it in two stacks and wrapped it up! I also added another big note for her to explain that she has to put the first stack on the ring binder!

Of course I know she speaks both languages, so I wrote in both... Which is something I end up doing automatically when I talk with people too! As you know...

This is how it looks up wrapped up, this will be the first thing she sees when she gets it out of the envelope!

ENVELOPE
The envelope needed some decorating too! Again I used the butterflies, stamps and 3D pearl paint. Oh I also used some gold mod podge that is on my desk... Which worked out very well, since it could properly dry! It gives such a nice shiney effect.

The back :)

A little note for the post person too! :)
Thank you dear mail person, you're a hero!
Thank you dear mail person, you're a hero!

I also added another sticker to the front, because she was talking about her fav disney character! I had the sticker so I used it!

And the last photo with the stamps! I went to get stamps, because I really don't like it when they use a sticker with the postage to sent post... It is so ugly. (Sometimes I have to do it...) These are stamps from the Beleef de Natuur (Experience the Nature) series: Veldbloemen (Field Flowers)

I really hope you didn't get tired of looking through the photos!
Of course I will add the link when she makes her video! For now you can go look at her other videos!
Have a lovely day!
ETA: Vivian opening it :) There are 4 gorgeous mails before this one, she opens mine around the 15th minute! Enjoy watching it :)


Comments
Post a Comment