Happy Mail for Charlotte
So on the 9th of May I got a letter from Charlotte. She's been my penpal for years and years. This friendship started with postcard exhange in a livejournal community. Anyway, we still write, we have met and it was lovely.
Anyway.... I was looking through my papers, but was not happy... To be honest I have too much choice, instead of picking something I decided to make something myself.
Here are the materials used:
- Kraft paper-carton block (from Wibra)
- Decoration set by Decotimecrafts
- Stickers by Decotimecrafts
- Envelope C6 (Hema)
- Washi tape (Hema)
- Stamps: Veer & Moon (Studiolight) Cosmea (stampvm07), Chrysantyum (stampvm13), Gerbera (stampvm17) and Amaralys (stampvm18)
- Pigment Ink Pearlascent (CardDeco Essentials): Gold (CDEPL026), Black (CDEPL030) and Golden Red (CDEPL031)
- Pelikan Glue(stick
- Black Marker
- Rope (from penpal)
- Scissors, Stanley knive
- Bone folder
So I have used all the white paper in this block and have some kraft paper and black paper in it. I decided to go for the kraft paper, which gives me the option to write with a white pen, depending on how I will feel.

Took two pages out and folded them double, used the bone folder to make it flatter and cut it with the stanley knive to end up with 4 pages (A5)

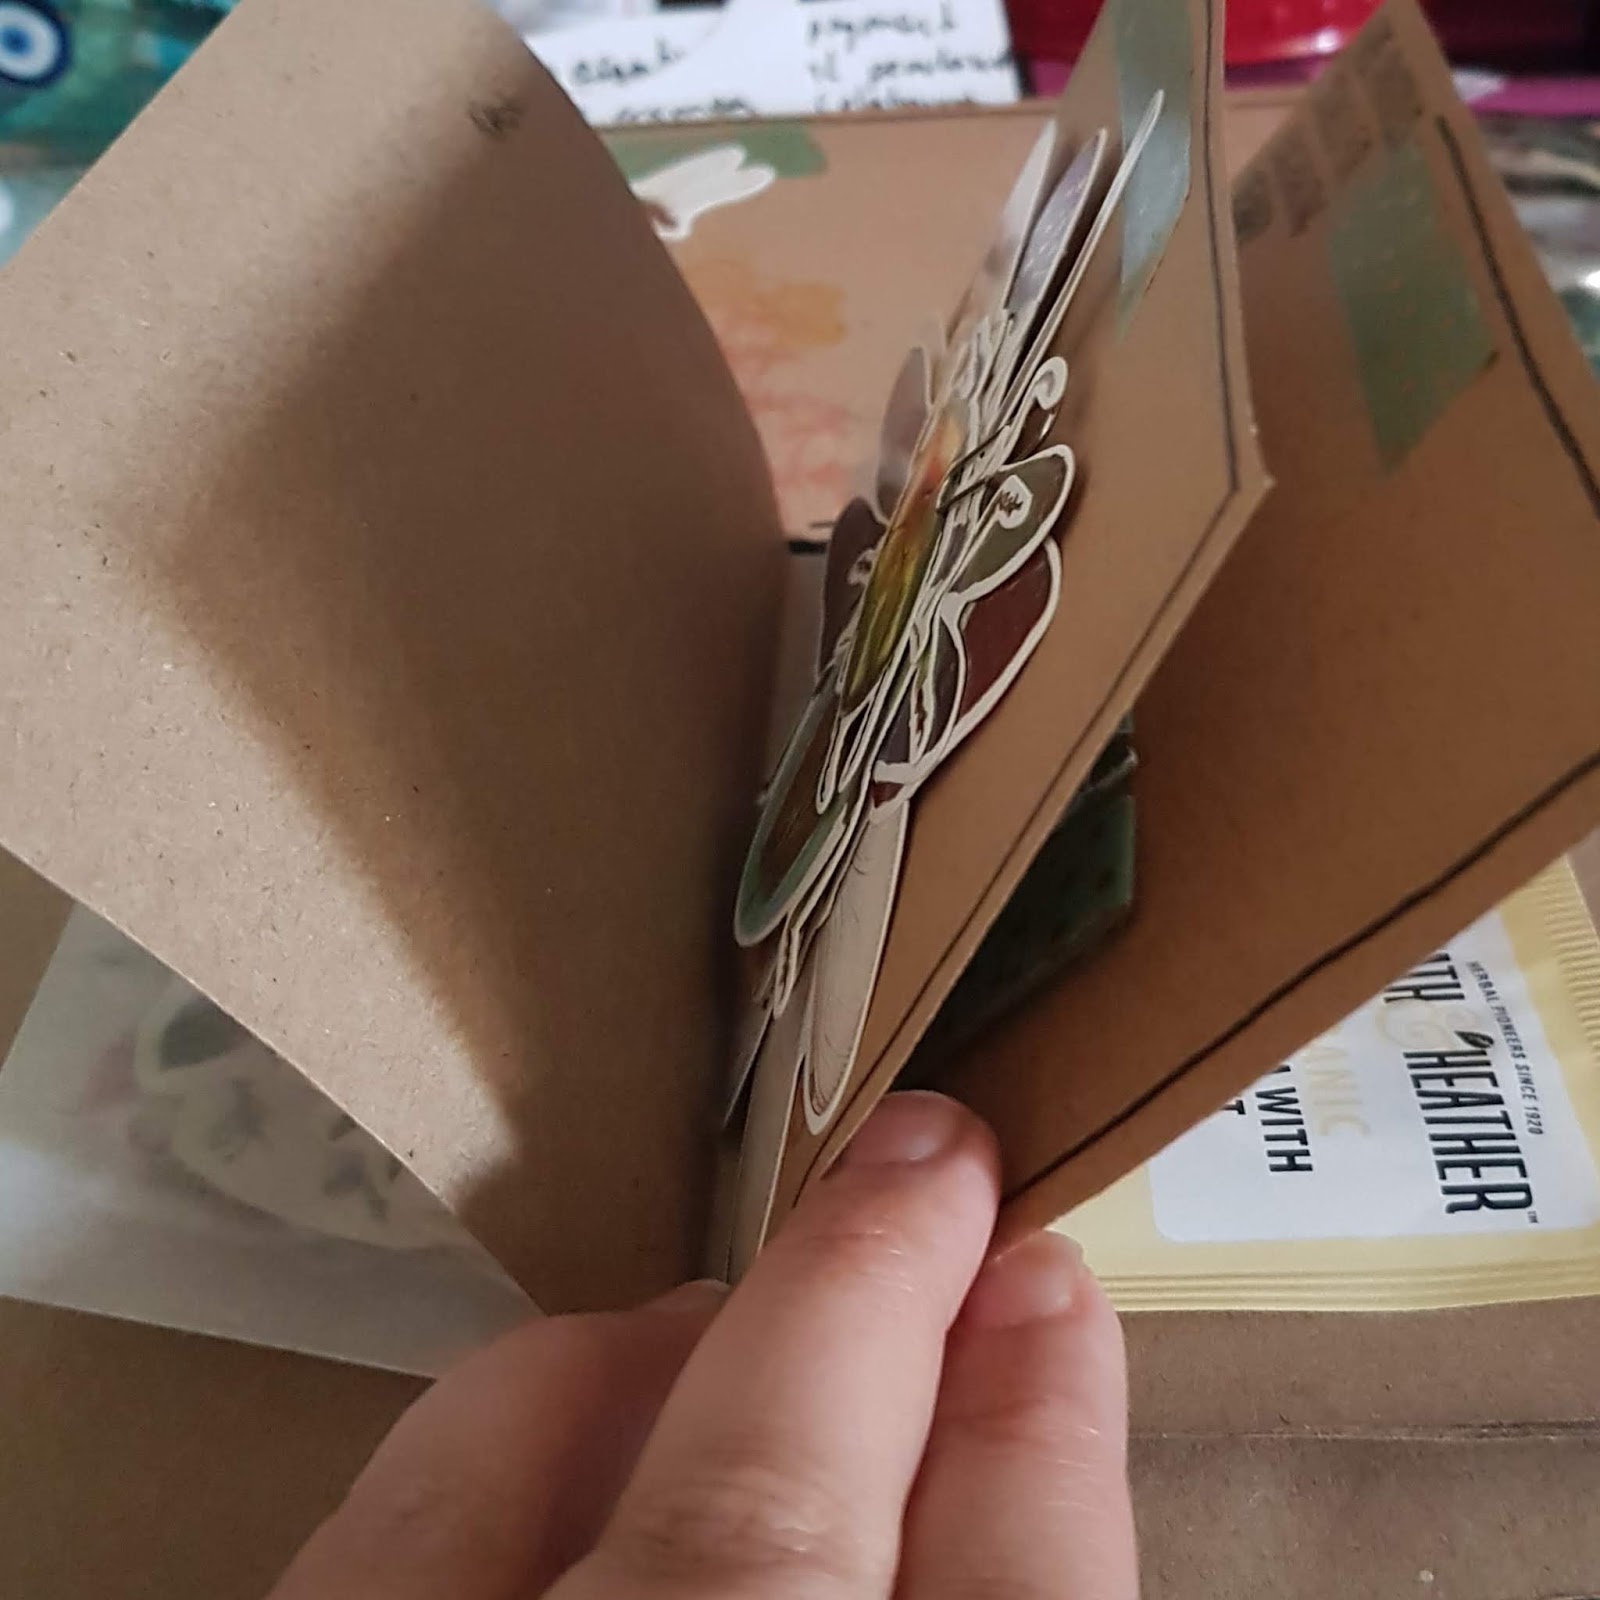
I took out the decoration set by Decotimecrafts, from last year. I loved this packages so I did end up buying a couple of them... I had this in lying around and thought it would be good to use it. I loved making things with the insects in it. Also this was sold last year, this year they had different sets.
I don't know if you can see it in the photo, but there is gold foil on each, so I decided to use gold as well.

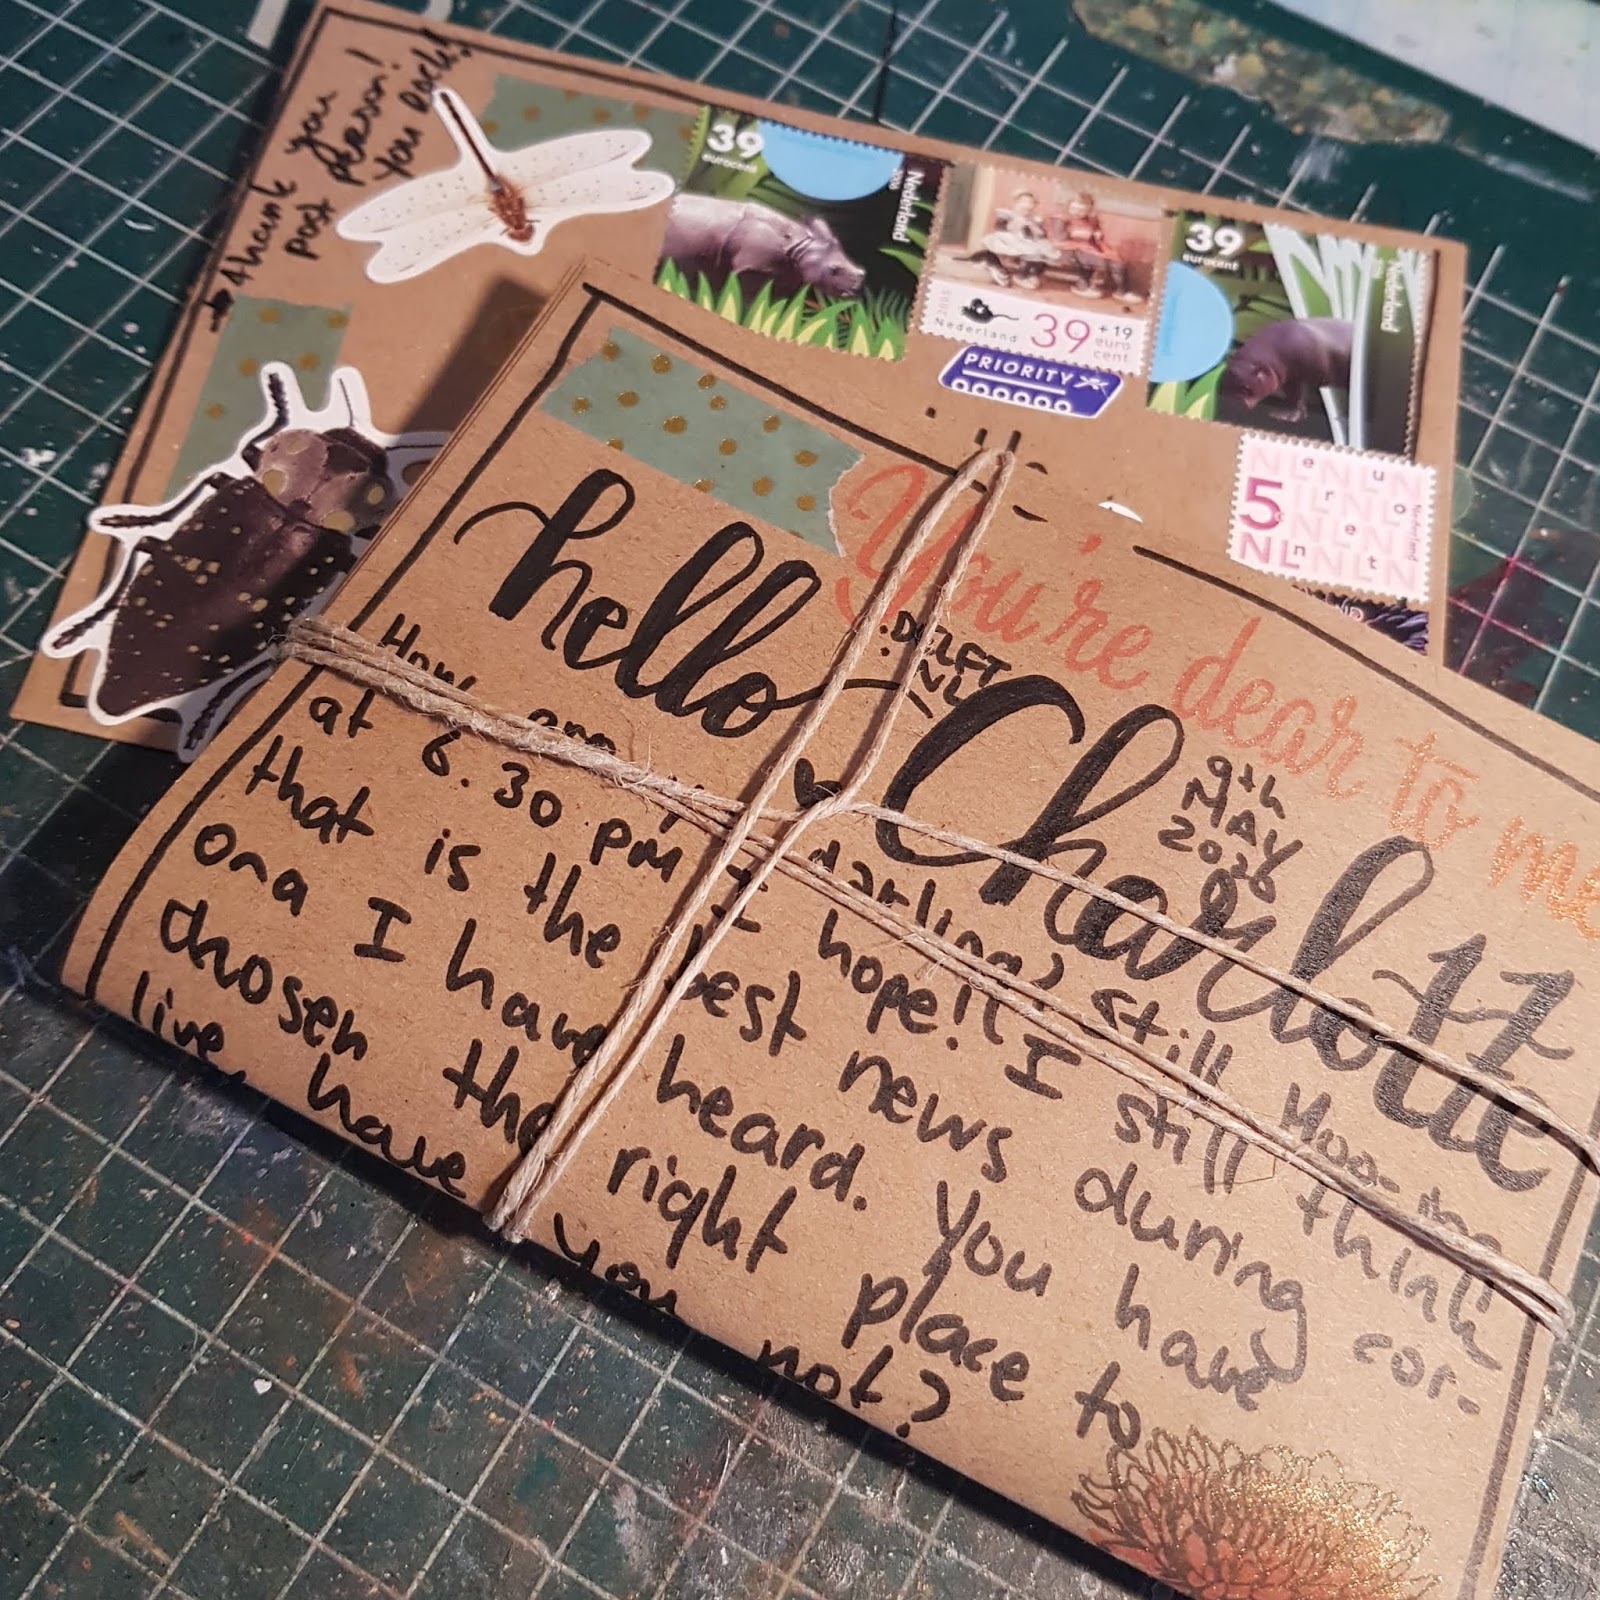
I have these kraft envelopes from HEMA, so instead of making one I used it. I also have way too many envelopes...

I also wanted to use some stamps, so I looked through my many many stamps. Studiolight has a collection called Veer & Moon with gorgeous flowers, their meaning and a big sentiment. I probably should use these more often!!! Anyway, 4 pages, so I picked out 4 stamps:

For the inks I decided to use a new collection I started last year... I know I have issues!
The Card Deco Essentials collection has these "platinum" inkpads with a shine it in, so I decided to use them... Ended up using only 3 of the colours: Gold, Gold Red and Black.

I am not sure if you can see it in the picture, but I love the little glittery part in it.

This is how they ended up looking when I have had all the flowers stamped out:

Choose the left or right side of each page to add the flower, then the meaning and lastly the sentiment. Just stamped them the way I thought it would look good. So not each stamp has the whole image. Each page under here:


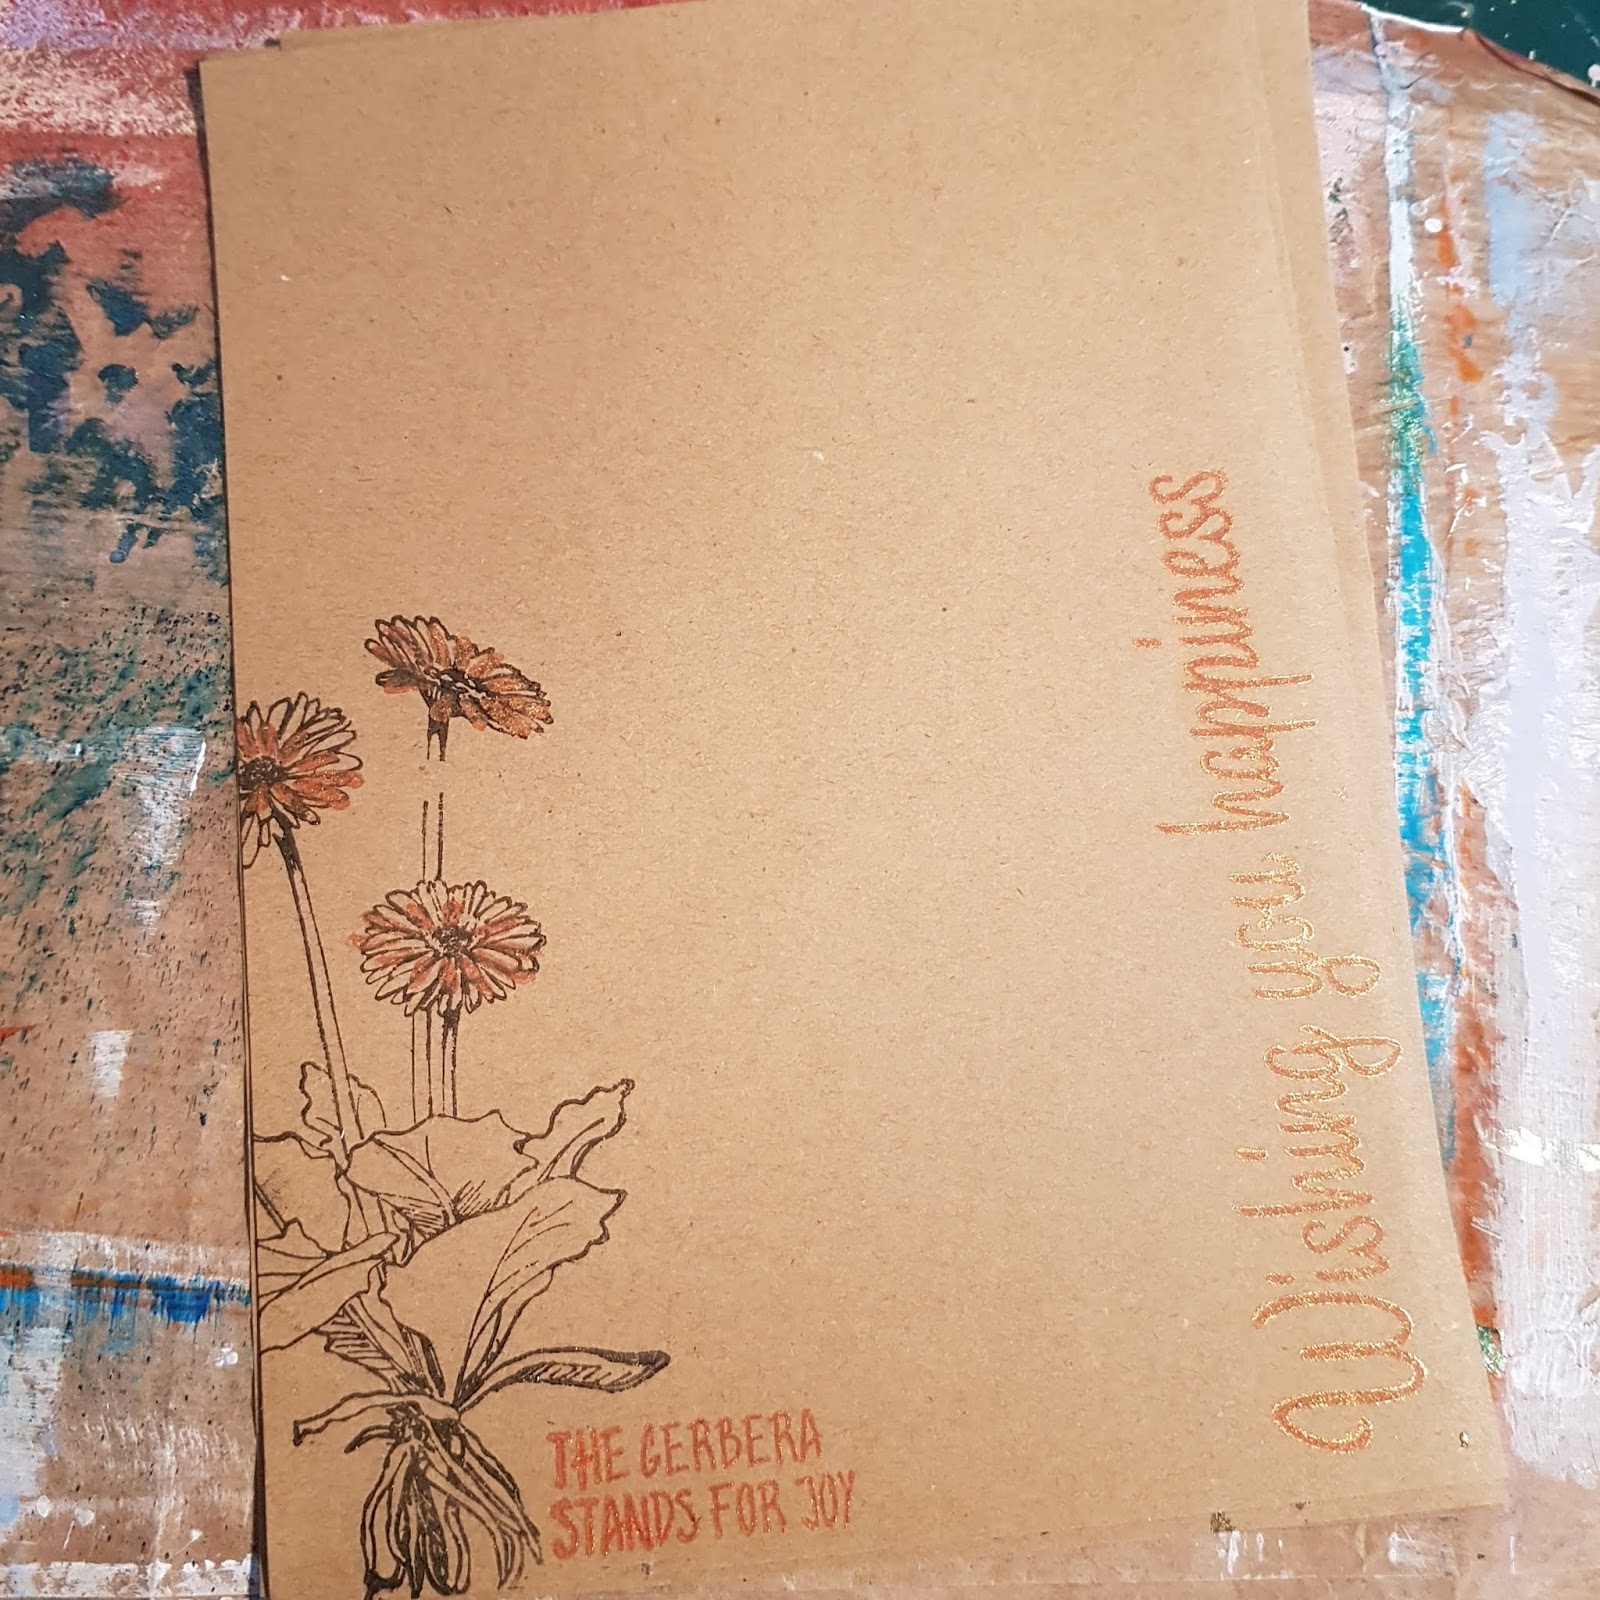
Ones finished I looked at the pages and felt it was missing something and added a border with a black marker.

Next was the envelope: Picked a flower, used red ink instead of black. This is the envelope so I decided to go a bit different. It felt like it was missing another colour...

So I took out the latest washi tapes I bought from Hema:

Stick pieces of the green with golden dot washi on the envelope and the pages.

Next was the use of the decoration set (okay they're die cuts to me...) and picked out the things I liked to add to the writing pages and envelope. Used a glue stick to glue them. (I usually have pritt, but wanted to try the pelikan one from action. It sticks! haha)

This is how the pages and envelope ended up looking. I thought I had taken a photo of each page to show... I did not. Sorry!

Now for the goodies!
The decoration set, I used had some of the bigger pieces that I could not use. So instead decided to use them as a goodie.

Since I used some of the washi tape, I wanted to add some of it in her letter as well. I keep the packaging of things so I can cut it out to use them for washi tape.

I used a punch hole to thread a rope in it. Not really necesarry... but if you end up making more samples, you can rope them together as well.

I was looking through my box of penpal letters, I ended up taking out the goodies I got to use. Should not hoard. Anyway I put all the rope and ribbons in a bag. Picked a rope I liked to use to keep things together.

I have a box of stickers, that I cut around. They're from DecoTime crafts and I had all these empty used spaces, that is why I decided to cut them. Picked these out:

Put them in a tiny envelope (from a penpal as well) and picked out two teas to add as well.

So I used all the little gifts to put between the pages.
Rope around the letter so the goodies don't fall out of it... As if that is possible.

\
This is how it ended up looking when I finished writing it.
I've been adding a thank you to the post person on my envelopes.
So all of the stuff I used ( I did see I forgot to add the washi tape)

Anyway, I realized this is less exciting than actually watching it on a video.
I also realized I forgot to take photos in between... It took a bit longer to finish this because of all the photo taking...
I do hope it was fun to read and scroll through.
I also hope Charlotte will enjoy the letter.
Love Seher.


Comments
Post a Comment